
Monday, 20 December 2010
Saturday, 18 December 2010
Flip
Flip Test 2 from Jonathan Finch on Vimeo.
For this video I was trying to create the effect of the word 'Flip' being flipped by a tiddlywinks counter. Im fairly pleased with the result but I think I could sharpen it up on a second attempt and make the flips look more realistic.
Wednesday, 15 December 2010
Studio Development


During a studio development session with Lorraine we looked at how the frame of a video consists of title safe and action safe areas and designed an animated sequence over 25 separate frames with this in mind. From these frames, we then picked out which would effectively be the key frames in a video sequence and also considered what methods of transformation we would need to use to implement the effects we wanted.
Tuesday, 14 December 2010
After Effects Workshop 3

Anchor Point is not in the centre of the text but it can be altered through 'Transform > Anchor Point' or through the 'Pan Behind' tool as shown below.
Additional properties are available with a text layer. Path Options and More Options.

Source Text allows you to introduce Key Frames to manipulate the text, EG Add more to the sentence or have the type change colour.

Adding to the sentence -

Changing colour -

Animate, found next to Source Text has further options:


Animating the text through 'Position' function on the Animate drop down menu.

Opacity

Key Steps to remember:
- Add Animator change
- Change property value
- Use Range Selector to animate the change
* Using either Start and/or End Keys are important when determining how you want the change to occur.
This is getting confusing now!
Layer Masks :

Wednesday, 8 December 2010
Silent Move : Idea frame sequences
Quick frame sequences based on the 3 given words : Flip, Extend, Zoom.
5 frames per idea to communicate the 5 second time frame we are working within.

Zoom


Extend
Tuesday, 7 December 2010
After Effects Practice Video 2
Enter from Jonathan Finch on Vimeo.
Breakthrough in After Effects!!
Key frames, Interpolation, Tweening...its all starting to make sense...well...kind of
After Effects Workshop 2
Creating assets in Photoshop to place into After Effects
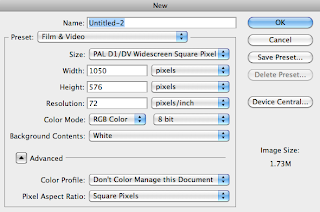 Select Film & Video preset and PAL D1/DV Widescreen Square Pixel (as in After Effects)
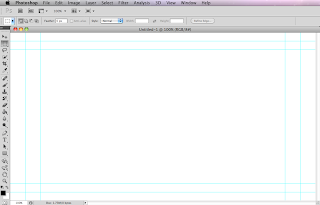 Title Safe Frame (Inner Rectangle)
Action Safe Frame (Middle Rectangle)

Each character created individually so that they could be animated individually later in After Effects.

This is how the document looks in Illustrator.

Importing from Photoshop into After Effects.
FILE > IMPORT > IMPORT AS > COMPOSITION/FOOTAGE
Depends on how you want to use it:
Footage - flattens file
Composition - retains layers
Composition Retain Layer Sizes - Eg. Different anchor points, letter rates around its own anchor point rather than the whole word's anchor point

Document imported into After Effects.
Any Photoshop artwork should be imported at the largest size you will need it, therefore you will only be making it smaller and subsequently it won't become pixelated.
ANIMATION > KEYFRAME INTERPOLATION:
- Linear
- Bezier
- Continuous Bezier
- Auto Bezier
- Hold
ANIMATION > KEYFRAME ASSISTANT:
- Constant Speed
- Ease In
- Ease Out
- Hold
FILE > COLLECT FILES:
Puts all documents used in the making of the video together in one folder.
Rendering:
COMPOSITION > ADD TO RENDER QUEUE
RENDER SETTINGS > TIME SPAN > LENGTH OF COMP
OUTPUT MODULE > LOSSLESS > FORMAT > QUICKTIME
FORMAT > VIDEO CODEC > H.264 (OK)
OUTPUT TO > NAME IT & SAVE IT (RENDER)
Monday, 6 December 2010

Wednesday, 1 December 2010
Tuesday, 30 November 2010
After Effects Workshop
Adobe After Effects - aka - 'Photoshop for video'
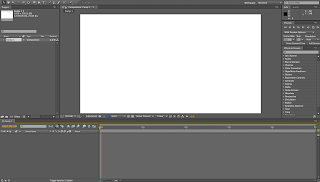
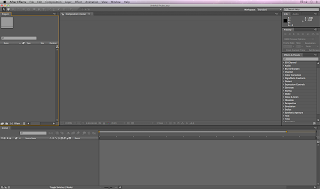 Standard After Effects document screen. It is possible to rescale each of the different panels and close what you don't need. To reset the layout to it's original set up select : WINDOW > PROJECT
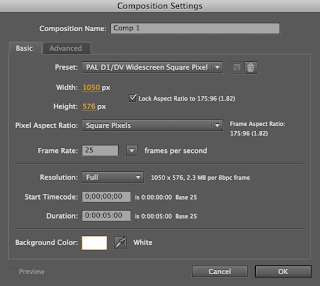 Once assets are imported into the project file, they can then be manipulated.
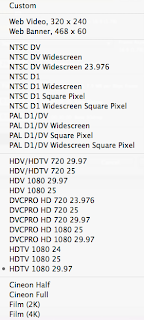 From the above list of presets, PAL is UK standard;
- PAL D1/DV Widescreen is for use with video clips, as the pixels in the video are a little more rectangular.
- PAL D1/DV Square Pixel is for use with computer generated work, therefore pixels stay the same.
- PAL D1/DV Widescreen Square Pixel is what I will use so that I can keep the 16:9 ratio required, whilst working with computer artwork.
 Blank PAL D1/DV Widescreen Square Pixel composition
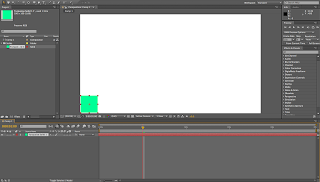 Adding a new layer means adding elements to the document. Above I have added a simple square of solid colour measuring 100 x 100 pixels.
 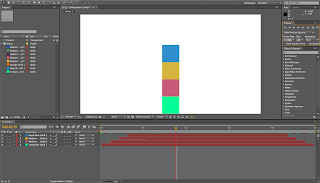 Adding more layers to the composition.
 Each layer has a small drop down menu that gives you four key methods of manipulation; Anchor Point/Position/Scale/Rotation/Opacity. Each of these methods can be finely adjusted with regards to timing and co-ordinating different elements of the animated sequence.
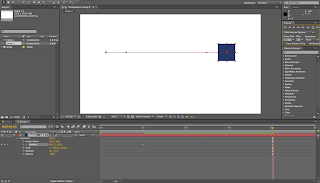 Moving path shows the points to and from the object is moving.
After Effect Shortcuts:
Select Layer & P > Layer & Position
Select Layer & A > Anchor Point
Select Layer & R > Rotation
Select Layer & S > Scale
Select Layer & T > Opacity
Select Layer & B > Shows beginning of the work area
Select Layer & N > Shows the end of work area
Select Layer & U Shows the animated properties
Select Layer & UU Shows all modified properties
Select Layer & I or O to move to the input or output of that layer
Design For Digital : Silent Movie


Tuesday, 23 November 2010
End of Module Evaluation
1. What skills have you developed through this module and how effectively do you think you have applied them?
Since the start of the module I feel I have developed, in particular, the skills of documenting my working practices as well as my researching methods. Beginning way back in June through the Summer Brief 'What Is Good?', the task involved us collecting a large amount of quality, in-depth information on fields that we have a personal interest in and this helped to change the way I think about researching overall. I have also built on my ability to blog and document my work both more regularly and in greater volume. During this module we have also had regular seminars in Photoshop, Illustrator and particularly InDesign which have really helped to fill gaps in my knowledge that have enabled me to work more efficiently and professionally. Elements of these seminars also directly related to the design for print part of the module and helped to tie everything I was learning about the printing process together.
2. What approaches to/methods of design practice have you developed and how have they informed your design development process?
With this module being print and packaging based most of the skills developed during this time are connected to printing and production processes. Further things that have informed my approach have come from the seminars and workshops, all of which have improved my technical understanding of the printing industry, from the different methods of printing available to industry terminology and vocabulary. I have tried to absorb as many little hints and tips as I can, whether it be a rule to use when working with type and layout or how to professionally put together artwork that could be sent off to a printers.
3. What strengths can you identify in your work and how have/will you capitalise on these?
A particular strength I have identified in my work during the course of this module I feel is my ability to clearly and concisely communicate a message to an audience. I think through my working practices I am able to make an idea very accessible to a specific demographic. I also think I am starting to really understand how to better document my work and understand the benefits of doing so, as constant self analysis helps me to make quicker decisions that are also better informed. With a greater volume of documenting it also increases the value of my blog as it becomes a much more focused and important tool that can be used in the future to refer back to.
4. What weaknesses can you identify in your work and how will you address these more fully?
There are a couple of problem areas in particular that I feel I am yet to properly address and both of them are linked together. Firstly my decision making is still not quick enough. I am still reluctant to make mistakes and this hinders me especially in the early stages of a brief. Secondly, once I have an idea, I latch onto it and I'm almost afraid to wonder away from the core concept and explore wider avenues surrounding the theme. However, since I feel I have properly realised these problems, I am very determined and more confident that I can address them moving forward into the next module.
5. Identify five things that you will do differently next time and what do you expect to gain from doing this?
- Make decisions quicker and constantly evaluate why I am making these decisions so that my work can move forward at a more rapid pace whilst being better informed.
- I have started to discuss my work more regularly and informally with classmates which I found to be very beneficial and I want to make sure I do this from the beginning of the next module as it can really help to quickly solve problems that would take me a lot longer to figure out on my own.
- I want to take more advice from tutors and any studio help that is available to me as sometimes I feel once I have an idea I can do everything on my own and become less susceptible to taking onboard others ideas and viewpoints.
- Maintain my researching throughout the majority of my project instead of containing it to the initial stages of a brief.
- Begin scheduling and planning my work earlier on in the project as I have realised that getting a large amount of ideas, tests and experiments produced in the early stages will vastly help me improve my decision making and enable me to make better use of my time.
6. How would you grade yourself in the following areas: (where 5=excellent, 4= very good, 3= good, 2 average, 1= poor)
Attendance - 5
Punctuality - 5
Motivation - 4
Commitment - 5
Quantity of work produced -3
Quality of work produced - 4
Contribution to the group -4


Packaging Pdf
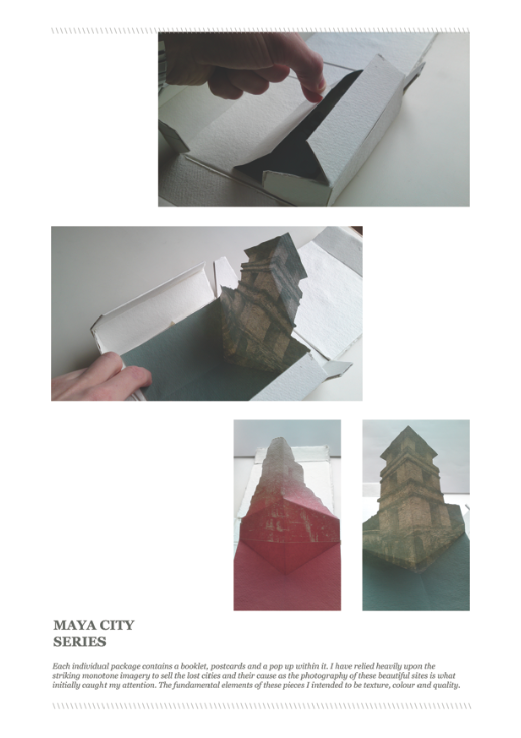
In the packaging pdf I have shown the design both with and without the net since the lines of the net wouldn't be printed out, but the printer may need to see the net in full so that he can see how the packaging is designed to work. Also the black text is designed to show the areas that are to be embossed. The box would be produced using a 'material over board' method with the material being 'Handmade Recycled Cotton Rag 150gsm'.
Palenque Box Contents pdf
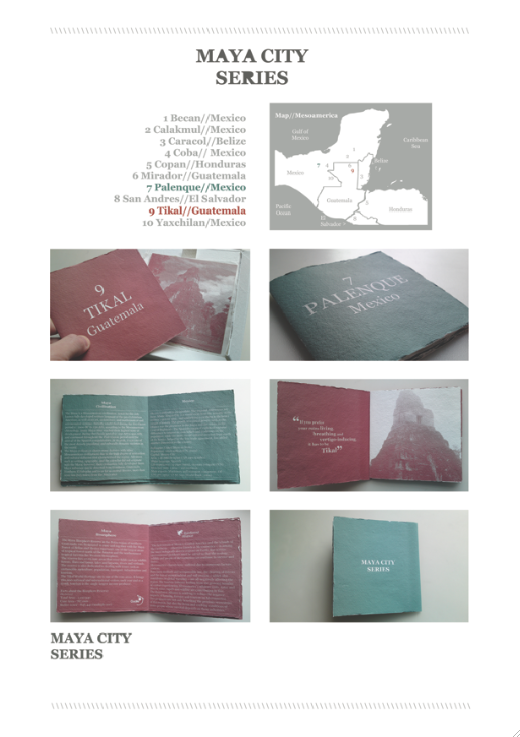
Each box in the series is printed using just one individual spot colour throughout, so that each of the lost cities can be colour coded. The spot colour for the 'Palenque' City box is Pantone 5545C. The contents of the box would all be printed on the same material that is used to cover the box packaging, which is 'Handmade Recycled Cotton Rag 150gsm'.
Tikal Box Contents pdf
Each box in the series is printed using just one individual spot colour throughout, so that each of the lost cities can be colour coded. The spot colour for the 'Tikal' City box is Pantone 7524C. The contents of the box would all be printed on the same material that is used to cover the box packaging, which is 'Handmade Recycled Cotton Rag 150gsm'.
Monday, 22 November 2010


Subscribe to:
Posts (Atom)